
Arthroscopic Trans-Osseous Knotless (ATOK) SHOULDER ANCHOR

ATOK Technique Summary
Assess rotator cuff tear pattern, and decide on suture placement.
Mobilize and debride the rotator cuff, and insert the initial repair suture (e.g. horizontal mattress or Mason Allen).
Prepare a footprint and create a shallow bony trench.
Pass relay suture using ATOK Transosseous Guide.
Advance repair suture through the bone tunnel and out through lateral shoulder muscle and skin.
Place additional sutures in the tendon and pass transosseously through additional tunnels using the same approach.
Once all sutures are inserted, place the ATOK Cannulated Rod over suture pairs sequentially, passing through skin and muscle and into humeral head cancellous bone.
Slide the ATOK Anchor Hub over the ATOK Cannulated Rod and advance into the lateral humeral cortex using the ATOK Hub insertion/ tensioning device.
Remove the guide rod and thread suture through the ATOK plug and advance towards the ATOK Hub.
Using the ATOK Hub insertion / tensioning device, apply appropriate tension to the suture and advance firmly into the hub.
Lock the plug using the ATOK plug pusher.
Check tendon reduction and suture tension, and adjust as needed. Usually, 2 ATOK Anchors are used.
If sutures have insufficient tension, reinsert the ATOK Hub insertion / tensioning device, pull on sutures to loosen the plug, adjust suture tensions, and then re-engage the plug.
If satisfied with tendon reduction, cut off sutures and repeat anchor insertion with other sutures.
Instrument List
ATOK™ Technique – Detailed Description
Equipment needed:
Sutures insertion equipment
Appropriate sutures
e.g. #2 braided polyester with polyethylene (UHMWPE) core.Third party suture passing device
e.g.a. Scorpion™
b. Bypass™
ATOK Hub and Locking Plug

3. ATOK instruments
ATOK Transosseous Guide (Transosseous Guide plus Capture drill)
- to pass the relay suture through the transosseous tunnel.ATOK Hub inserter/tensioning device
- to advance the ATOK Hub into the lateral humeral cortical hole, plus apply tension on sutures to reduce tendon tear.
Flexible Clearing Wire
- to clear bone from the end of the T/O guide
ATOK Cannulated rod
- To protect the sutures and guide the ATOK Hub into the lateral cortical drill hole.
Suture threader
Locking Plug pusher


4. Suture cutting device (third-party device)
5. Sundry material
a. Shuttle relayTM or #1 Nylon
b. Arthroscopic portals
Detailed Surgical Technique
Patient Positioning
Place the patient in the beach chair or the lateral decubitus position with the shoulder well adducted.
Portal Placement
Portal placement is at the surgeon’s discretion but should be placed to allow optimum examination of the glenohumeral joint and the subacromial space. Multiple portals may be required, particularly with a complex rotator cuff tear repair.
Although accessory portals are often required to “park” sutures during alternate repairs, when using the ATOK, the sutures can be passed through the definitive transosseous tunnels as they are inserted. This avoids needing to park, retrieve, and untangle previously inserted sutures.
Assess the Rotator Cuff Tear
The rotator cuff tear is mobilized, debrided and characterized. The tension on the repair is assessed, and the likely location of the relatively tension-free repair is determined.
Suture Insertion
The sutures are inserted into the retracted margin of the disrupted rotator cuff using an appropriate suture-passing device.
The suture morphology and bite style are at the surgeon’s discretion, but the recommendation is a horizontal mattress with a minimum wide 1cm bite and about 2cm from the tear margin, or alternatively, a Mason Allen suture grasp can be utilised.

5. Footprint Preparation
The rotator cuff footprint is defined and scarified. A shallow trench is created into the cancellous bone at the planned location of tendon re-attachment.
6. Transosseous Suture Insertion
Sutures are passed transosseously as they are inserted and “parked” in their definitive situation.
The ATOK Transosseous guide is inserted through the lateral portal, and the tip of the guide is advanced into the cancellous trench.
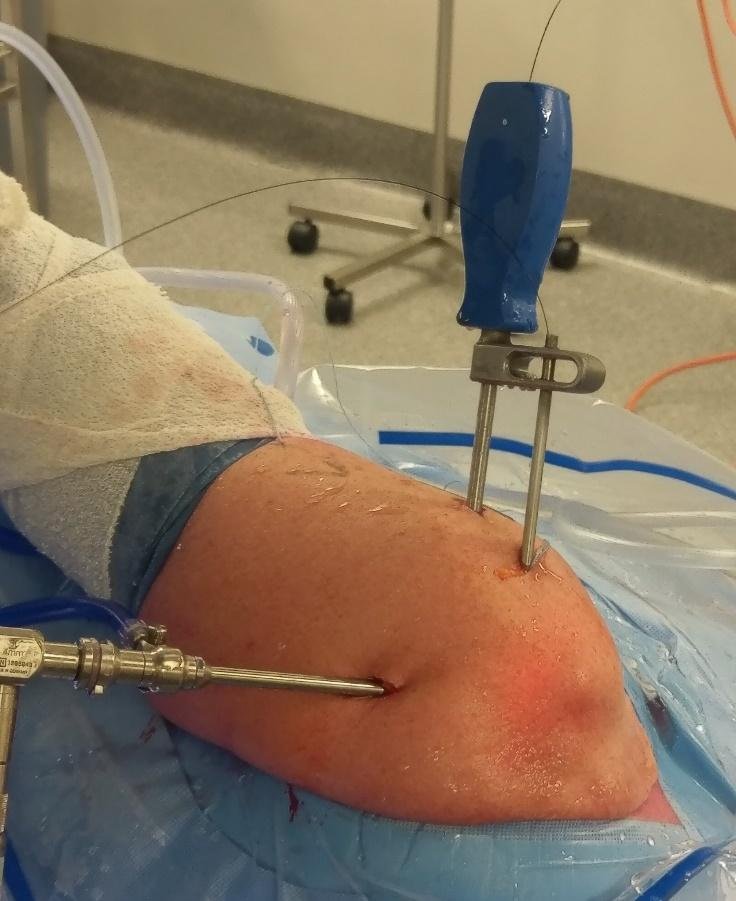

The Capture Drill is positioned over the skin of the lateral shoulder at an angle of approximately 45 degrees to the top of the shoulder. A stab incision is made in the skin to allow the Capture Drill to engage the lateral humeral cortex and create a drill hole in the lateral cortex.
The Capture Drill is then advanced into the humeral head to approximate the tip of the ATOK Transosseous guide.
7. Relay Suture Passage
The relay suture is then passed down the shaft of the ATOK Transosseous guide and, if positioned correctly, passes into the Capture Drill to be retrieved laterally out through the lateral humeral cortex. Insertion of a flexible cleaning rod may be required to facilitate passage of the relay suture.

The ATOK Transosseous guide is then carefully removed, ensuring the relay suture remains in place.
The tendon repair sutures are then attached to the relay suture as appropriate and passed transosseously to exit through the lateral shoulder muscle and skin.
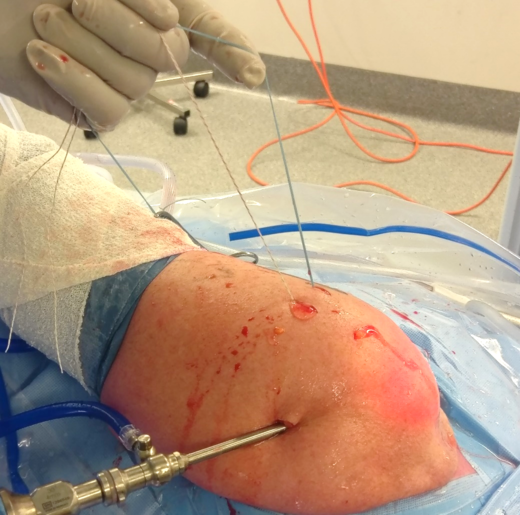
Subsequent tendon repair sutures are inserted as required and advance transosseously as above.
Once all sutures have been placed and taken transosseously, the ATOK anchors are inserted sequentially, ensuring the rotator cuff tear is adequately reduced.

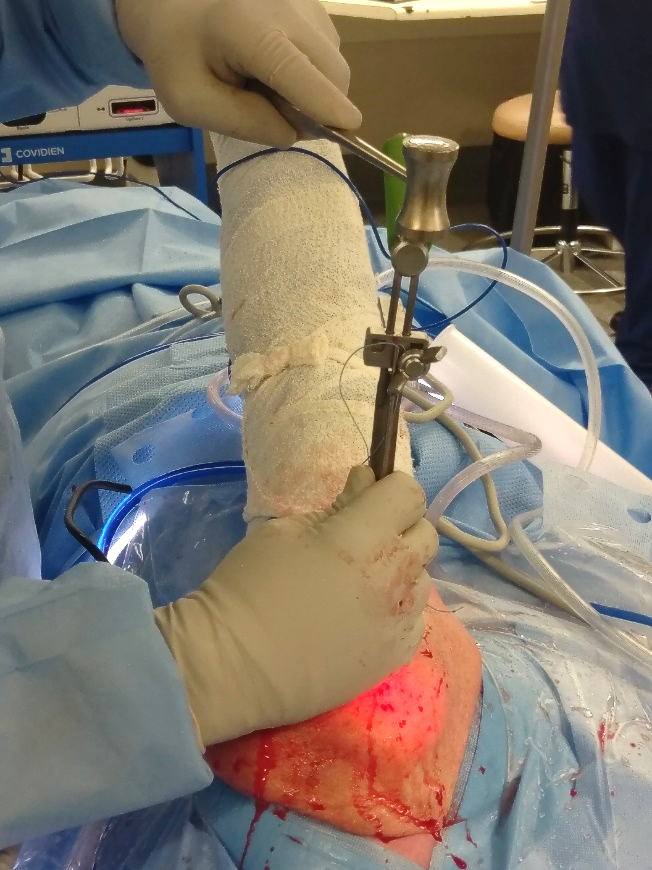
8. Insertion of Cannulated Rod and ATOK Hub
The ATOK Cannulated rod loaded with the ATOK Hub is passed over a set of sutures and advanced through the lateral humeral hole and into the cancellous bone.
9. ATOK Hub Insertion
The ATOK Anchor Hub is then slid down the cannulated rod, and using the ATOK Hub Inserter/ tensioning device, the ATOK Hub is advanced into the lateral humeral drill hole, impacting against the lateral cortex. A light hit with a hammer will ensure adequate seating of the ATOK Hub.


10. ATOK Locking Plug Insertion
The ATOK Cannulated rod is then withdrawn, and the sutures are threaded though the locking plug.


The locking plug is then advanced down the sutures and into the ATOK Hub inserter/tensioning device with the ATOK locking plug pusher, with moderate tension on the sutures to ensure the device remains lined up with the ATOK Hub.
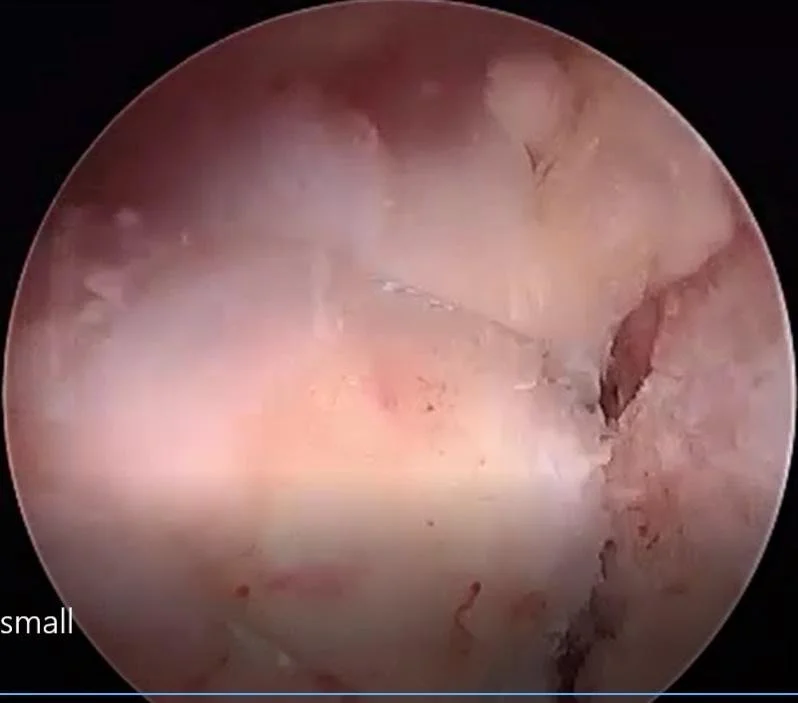
The sutures are then attached to the locking wingnut on the ATOK Hub inserter/tensioning device, and appropriate tension is applied to reduce the rotator cuff tear as planned. This is monitored by observing arthroscopically.
11. ATOK Locking Plug engagement
Once the appropriate tendon reduction has been confirmed, the ATOK locking plug is advanced using the ATOK locking plug pusher to lock the suture into the ATOK Anchor.


If the tension on the sutures is deemed to be too loose, reapply the ATOK locking plug pusher and apply sufficient tension with the ATOK Hub inserter / tensioning device to disengage the ATOK Anchor Hub. Tension is then applied to reduce the tendon repair, and the ATOK Locking Plug is re-advanced using the ATOK locking plug pusher.
When the correct tension on the repair has been confirmed, the suture can then be cut off, leaving a short length of the suture lateral to the ATOK anchor using the suture-cutting device.
Subsequent sutures are secured using the same technique. Various combinations of suture configurations can be utilized at the surgeon’s discretion.
Wounds are then closed with cutaneous sutures as appropriate. Post-operative immobilisation is performed at the surgeon’s discretion and protocol.


ATOK – Arthroscopic Trans-Osseous Knotless Repair